Creating a custom ad in Canva
Even as a graphic designer, I'm a big fan of Canva. Their free version is the same well-designed intuitive tool as the Pro version, and it has hundreds, maybe thousands, of free images, shapes, fonts, photos and more (the Pro version has even more content and a few more bells and whistles). In short, ANYONE with the desire to create their own marketing images can create something wonderful. For free.
"But Stacey, don't you get paid to create this kind of thing? Why in the world are you showing step-by-step how to do it ourselves?"
Look, I'm a small business owner myself. I know that small businesses often have more time than money. I want Hillsboro small businesses to succeed and flourish and get to the point where they have more money than time. When that happens, hopefully you'll give me a holler to do some of this stuff for you!
Let's create an MPU ad
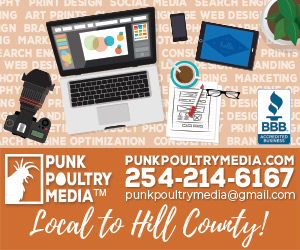
An MPU (stands for Mid Page Unit--means little in the grand scheme of things) is 300 pixels wide by 250 pixels tall, and it's a standard size ad for hundreds of websites, including the newly-launched ExploreHillsboroTexas.com.
EXAMPLES:
We're going to focus on the mechanics of creating a custom-size ad in Canva, moreso than the creative aspects.
First things first: If you don't already have an account with Canva, you'll need to create one. It's FREE. Just go to Canva.com and sign up.
The screen shots below are from the free version of Canva, but the Pro version looks almost exactly the same.
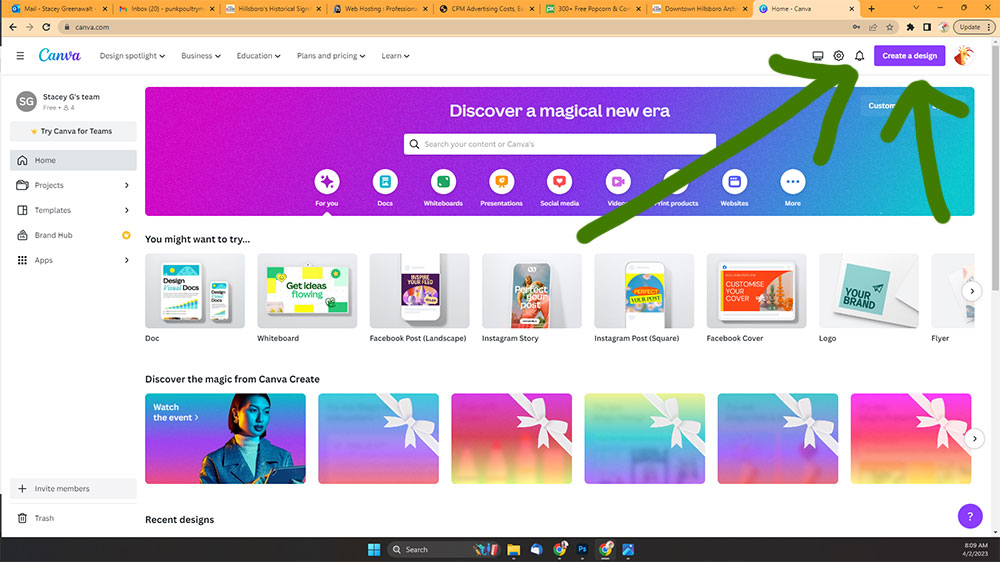
1. Open Canva
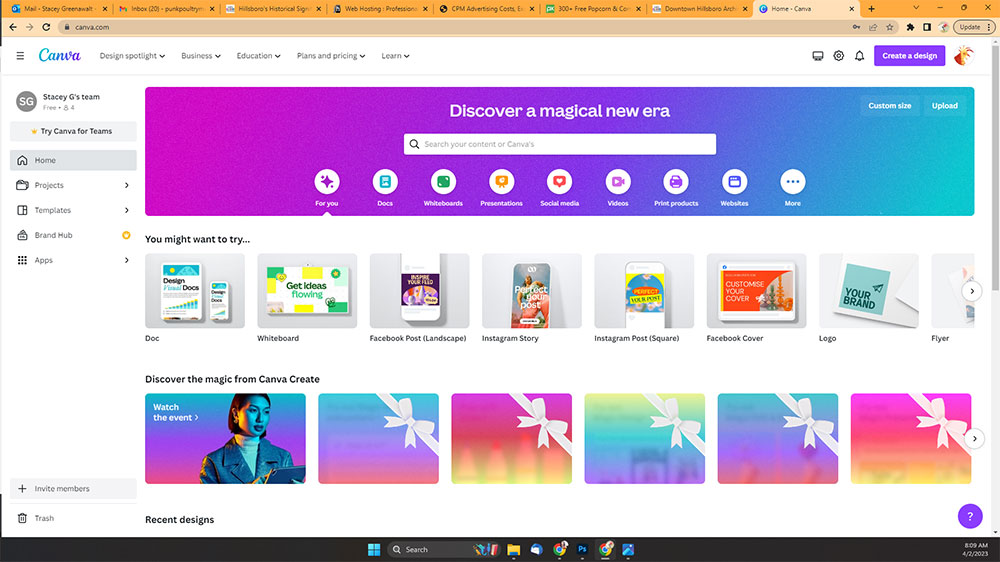
2. Click 'Create a design'
As you're moving your mouse to the 'Create a design' button in the top menu and clicking, take notice of all the options on this screen. Canva makes social media posts a breeze.
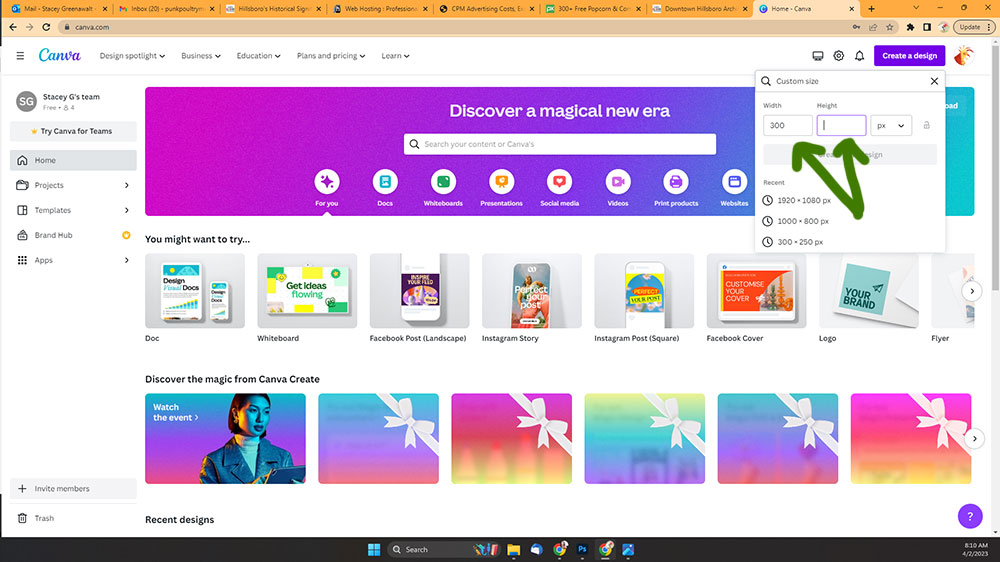
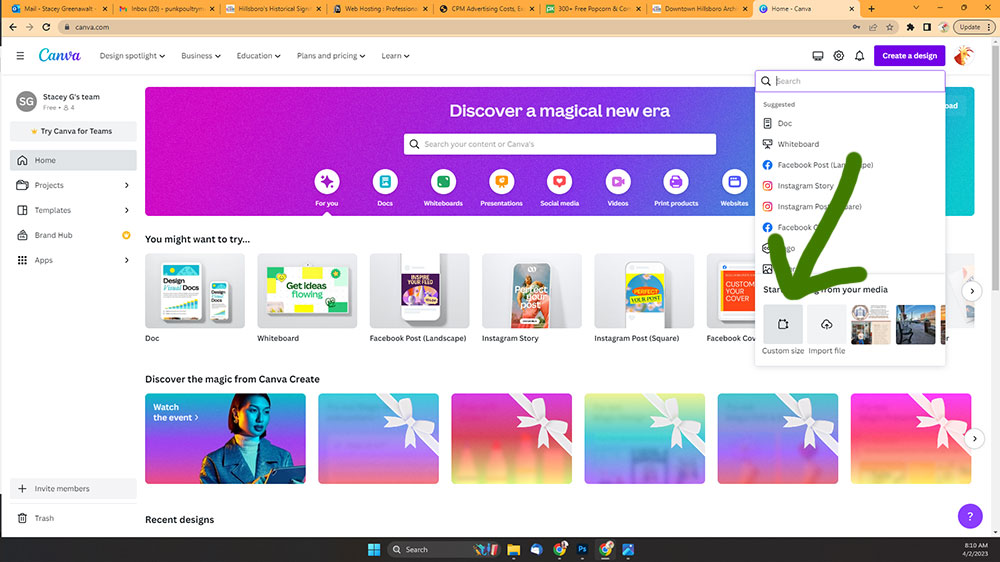
3. Click 'Custom size'
At the bottom of the resulting menu, click the 'Custom size' button.
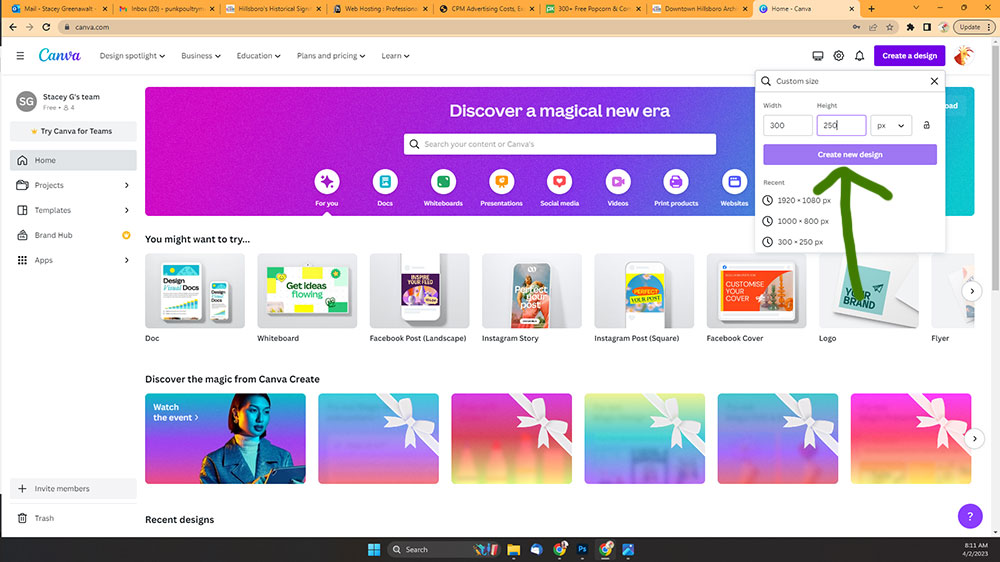
4. Enter desired dimensions, click 'Create new design'
ANY time you want to create an image with specific dimensions, this is how to do it. For instance, if you wanted to create your own ad for Lake Whitney Arts' Playbill, you could plug the dimension in here and get creative.
We're making an MPU, so we'll type 300 into the Width box, and 250 into the Height box. Then click 'Create new design.'
(Click the images below to view larger.)
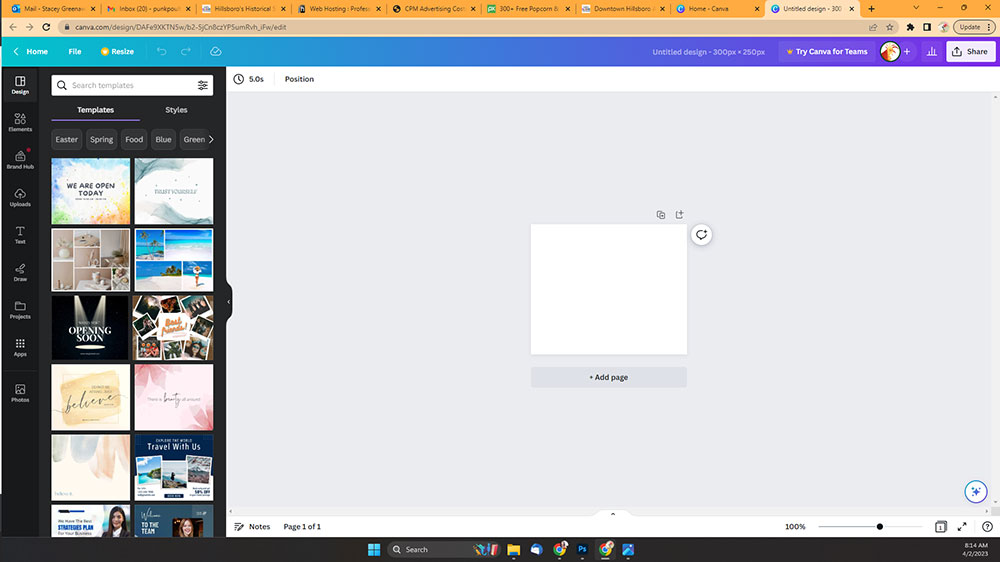
5. View at 100% or smaller
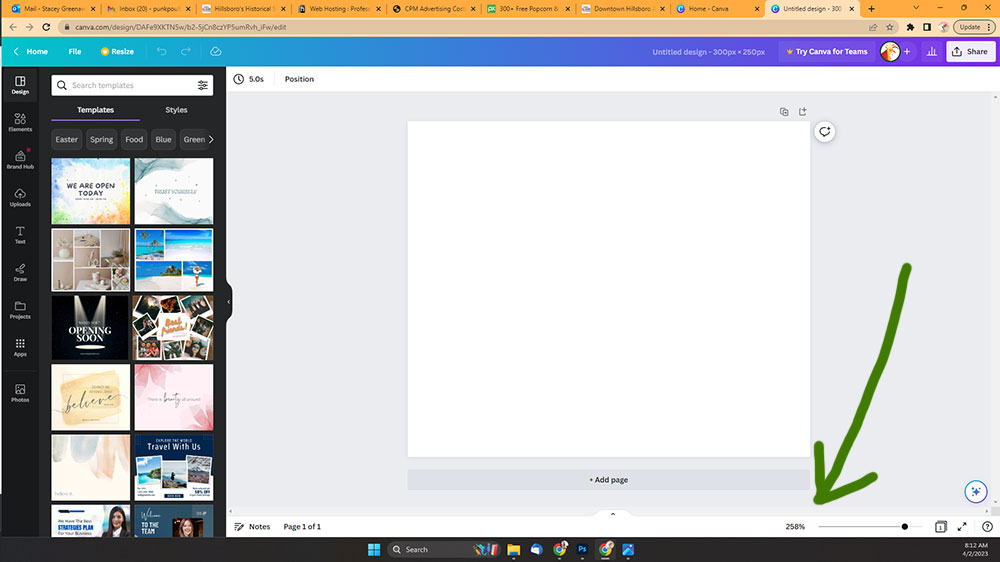
Your new custom-size image will open, and it will fill the workspace.
Side note: If you're new to Canva, take notice of the right-hand menu. This is where you'll find the tools to make magic. The 'Design' tab is open here and offers a boatload of pre-made designs (based on your design's shape--NOT size) that you can click. With the tools in this menu, you can upload your own images, add text to images, draw on and adjust images, even import free images from Pixabay and other sources directly to Canva.
Before we begin designing, we need to zoom out and view it at 100 percent or smaller. As you can see, mine initially displays on my screen at 258% with is WAAAAAYYYY larger than it will display on any website. It is best to have the image display on your screen at about the size the end result will display or be printed. In this case, the end result will only be displayed on other screens, so I need to design it at 100% (or smaller).
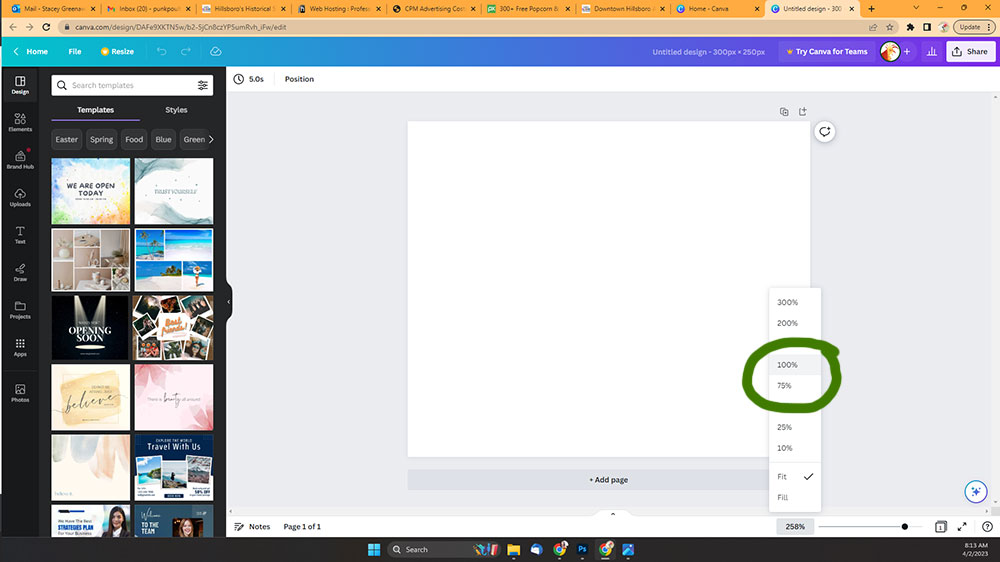
Click the zoom option and choose 100% or smaller
In the bottom of the screen you'll see a percentage slider. You can click and drag the slider handle, or you can click the numbers and a menu will slide up. Choose 100% or smaller.
6. Design the ad
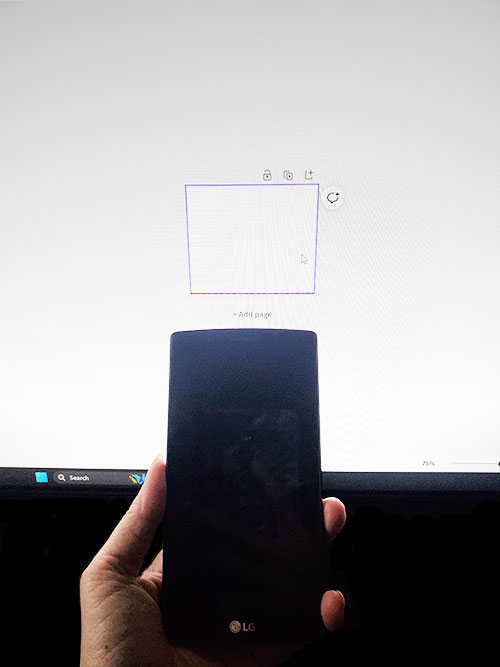
For MPU's, I use my phone as a reference. I make sure it displays on my screen no wider than it would display on my phone. In these images, I zoomed down to 75% after I took the screenshots.
I'll leave you here for a moment to do your creative thing while I do mine. When your design is done, come back and we'll export to JPG together.
Ready?
Let's do it.
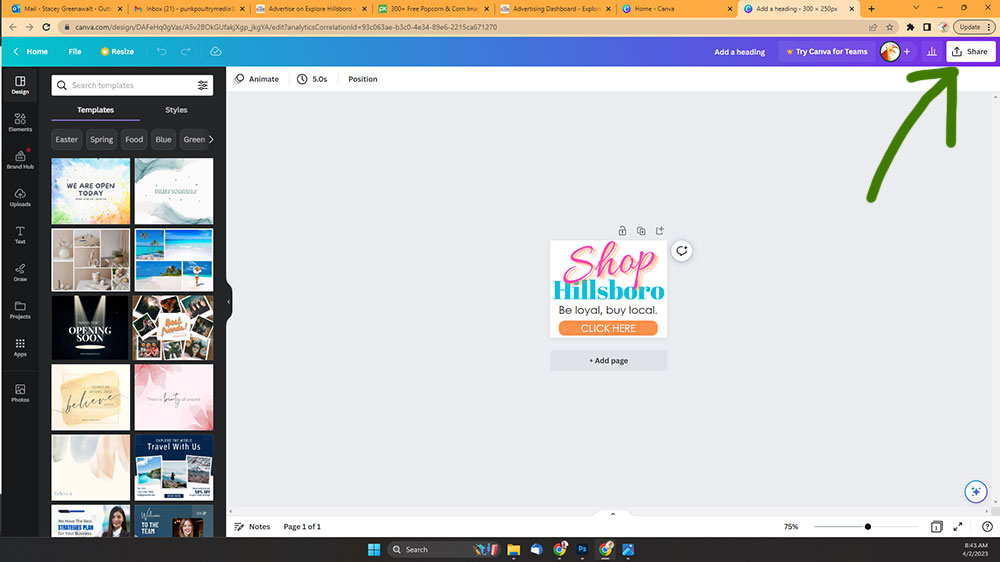
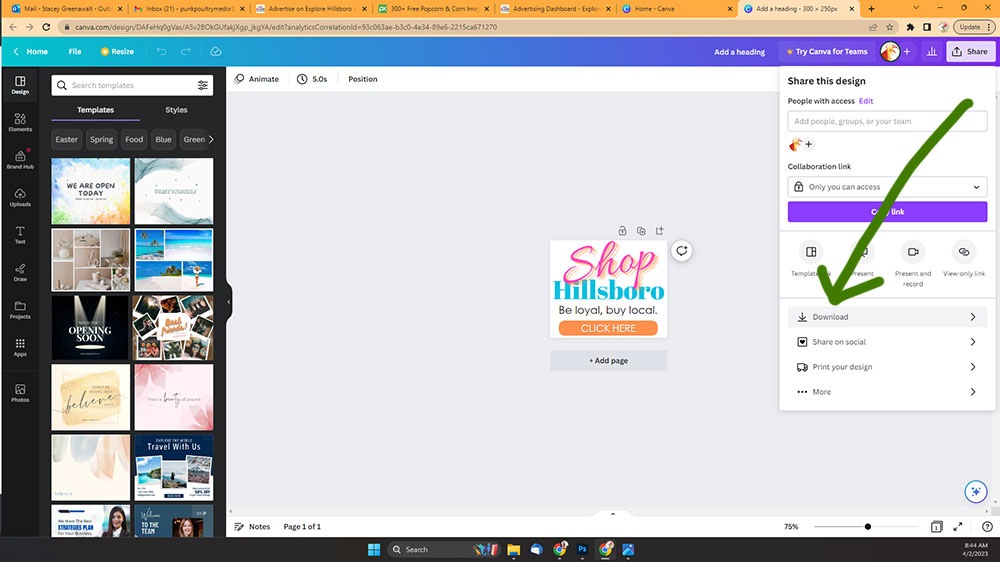
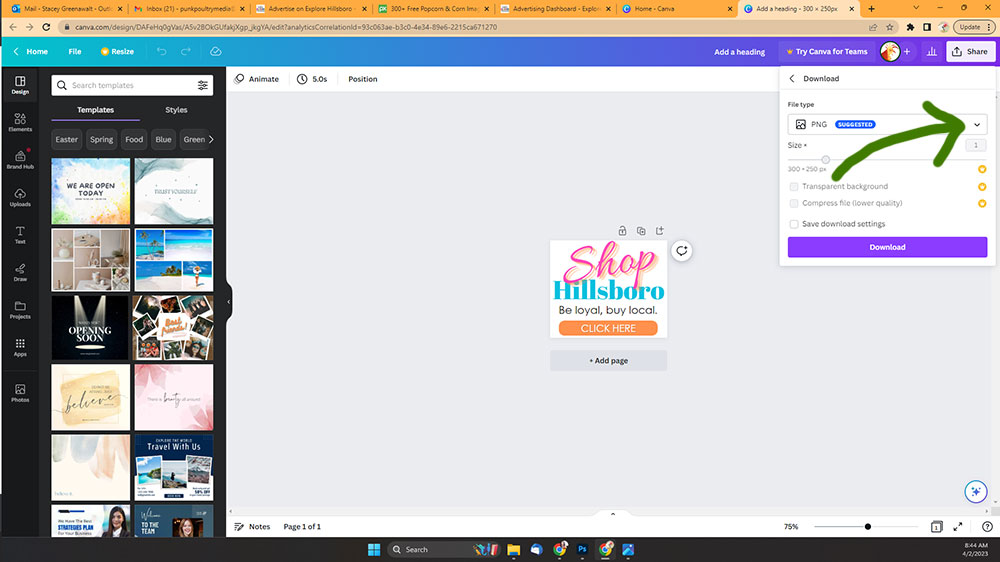
7. Choose Share, then choose Download
When your design is finished and you're ready to download, click the Share button in the top menu. Canva has lots of option for sharing images and documents created here. I encourage you to explore those later. For now, choose Download from the resulting box.
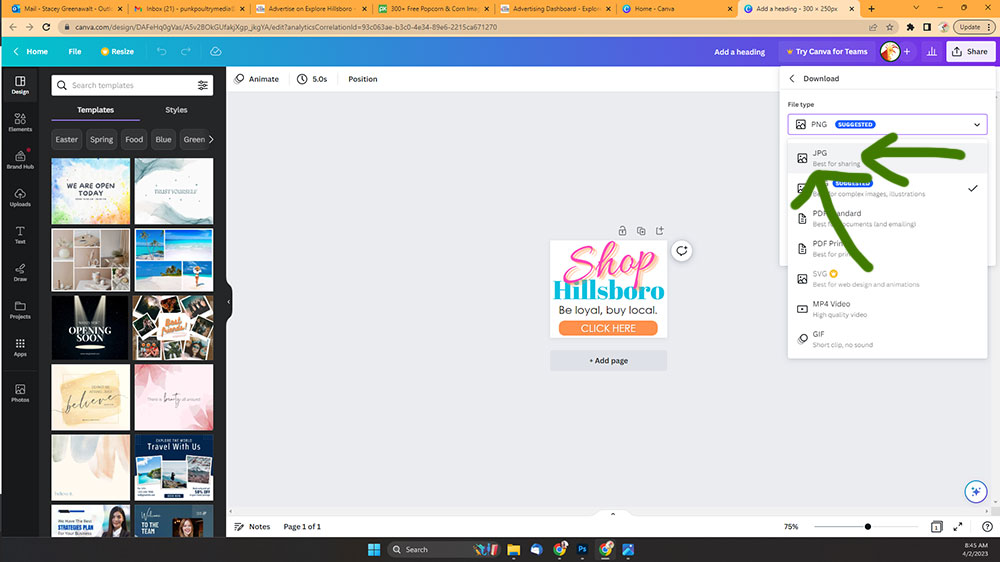
8. Choose JPG as the format
Canva's default for downloading images is PNG-- it it even says 'SUGGESTED'. I love Canva, as previously stated, but don't believe them. PNG is rarely the best option. You can read lots more about image formats for the web here, but suffice to say, JPG is what we need.
Click the 'down arrow' in the File type menu and choose JPG. See? It even says 'Best for sharing.'
9. Download your JPG
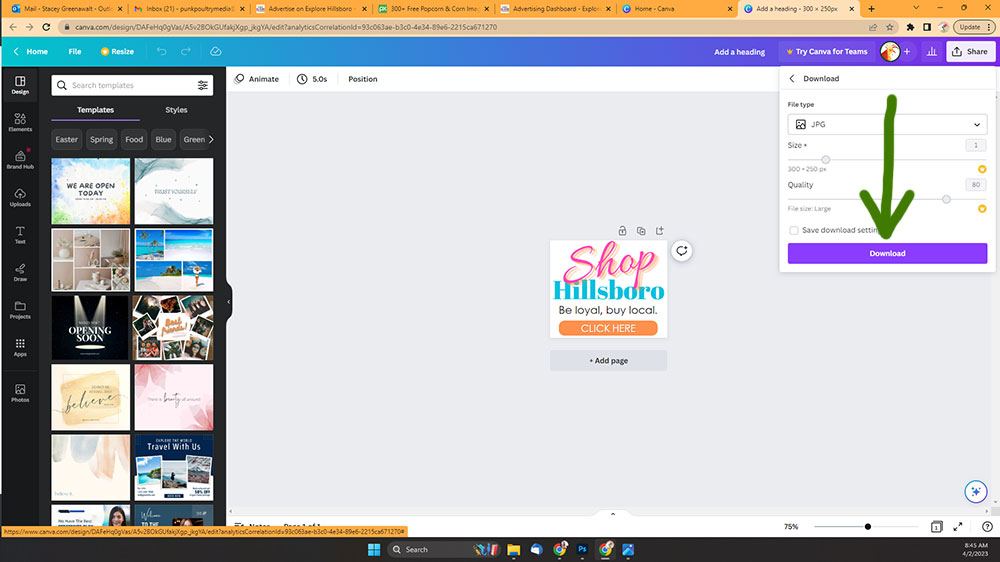
If you have Canva Pro, you can lower the quality to 60%-ish. If not 80% is fine. Click the Download button and save to your computer.
10. Do a little self-empowerment dance
You created your own ad that you can use anywhere! I suggest starting with ExploreHillsboroTexas.com, a site I built for the Hillsboro Area Chamber of Commerce. Ad dollars go toward increasing tourism in Hillsboro!
And here is the actual file I created in the steps above. Feel free to snag it, add it to your website, and link it to https://www.explorehillsborotexas.com/places/category/shopping/
No, I don't get any sort of kick-back from Canva. I genuinely feel it's a fabulous creative tool, and I LOVE that they offer the Pro version to 501(c)(3) nonprofit organizations at no cost.
How did I do the screenshots and draw on arrows? You CAN draw on images in Canva. For me it was easier/faster to use Photoshop. I have a two-screen setup so I pasted all the screenshots into a single layered file in Photoshop, cropped out the other screen, drew my arrows and circles for each layer, and exported each layer to JPG there.


